Micro Jig Splitter Steel PRO System
New Stainless Steel Core Splitter
by
4 Sept 2006
Micro Jig has added a new splitter to their arsenal. In response to those woodworkers who used the original MJ Splitter but who wanted a version more rugged for professional use Micro Jig has developed a stainless steel version of their popular plastic MJ Splitter. Micro Jig supplied the evaluation pieces back in April and I was delighted with the opportunity to test and use them. Click on any image to enlarge it for a closer look.
 In
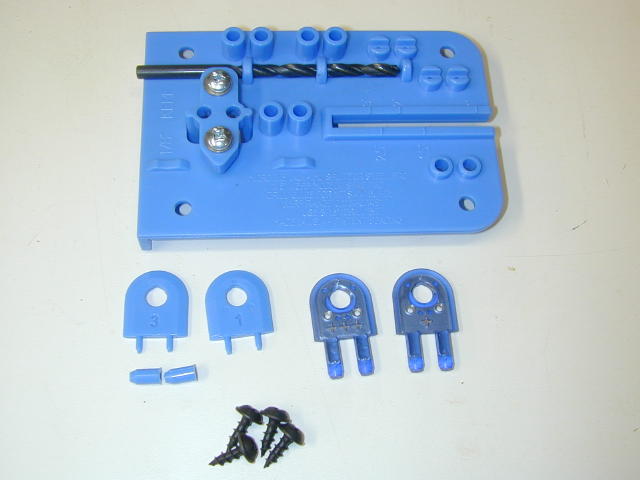
the package you'll find the items listed below. Note only two splitters and KK's are pictured.
In
the package you'll find the items listed below. Note only two splitters and KK's are pictured.
Each package
includes:
4 - Steel (Stainless steel) PRO splitters with tinted see-throughpolycarbonate
4 - Kerf Keepers (solid polycarbonate - no steel)
3 - Adapting Sleeves
1 - Drill Guide
1 - 3/16" drill bit
4 - Wood screws
1 - Installation manual
The splitters come in both regular and thin kerf versions. The 1/8" version (Blue) - model # SP-2 Steel PRO. The Thin Kerf version (Orange) - model # SP-2TK Steel PRO.
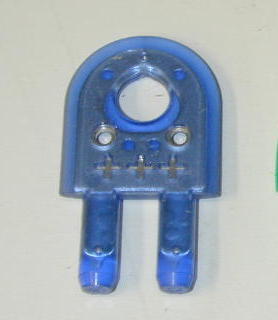
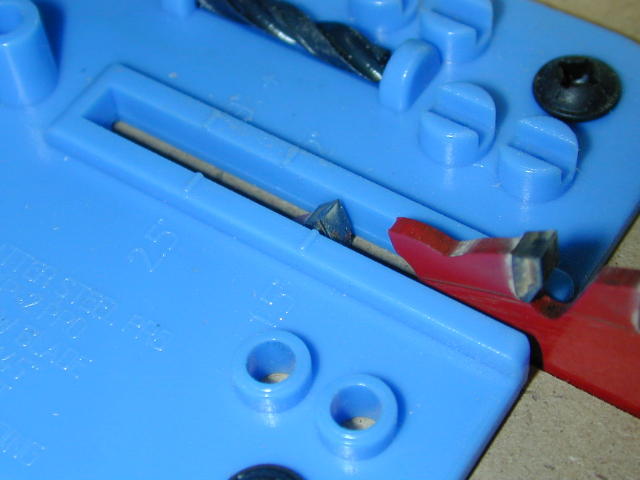
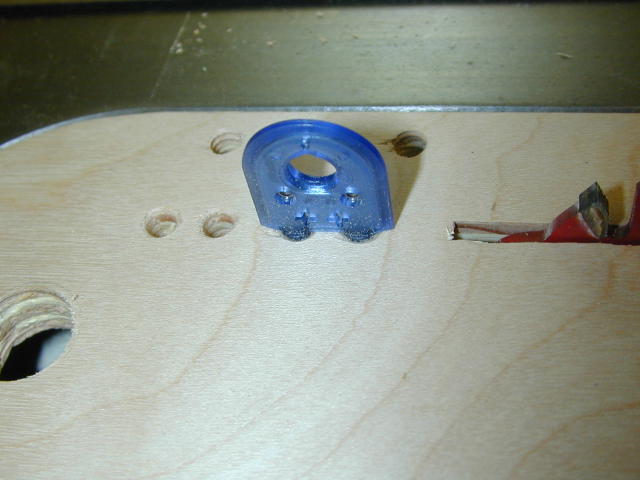
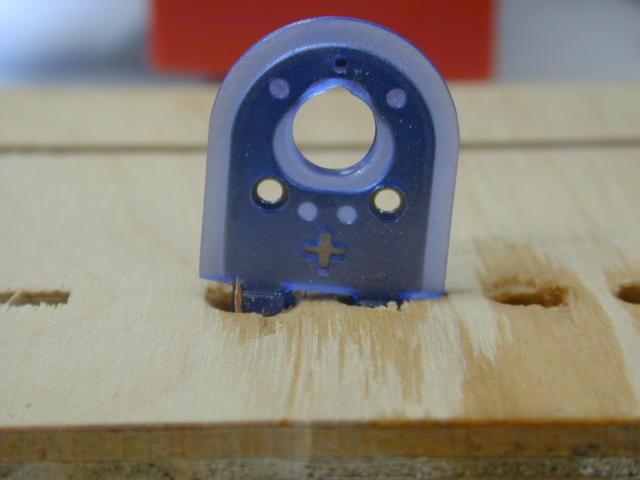
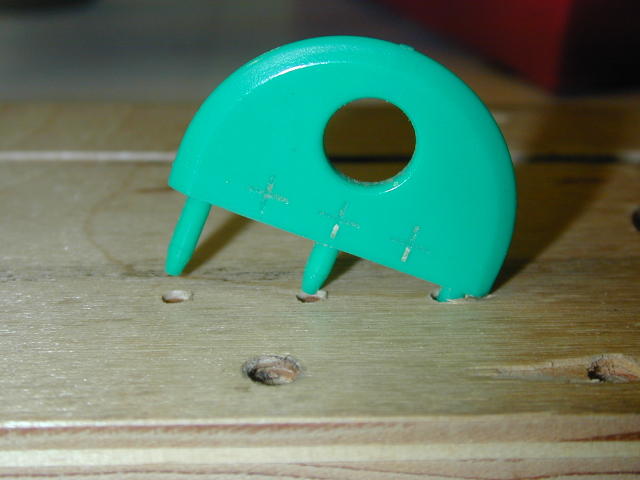
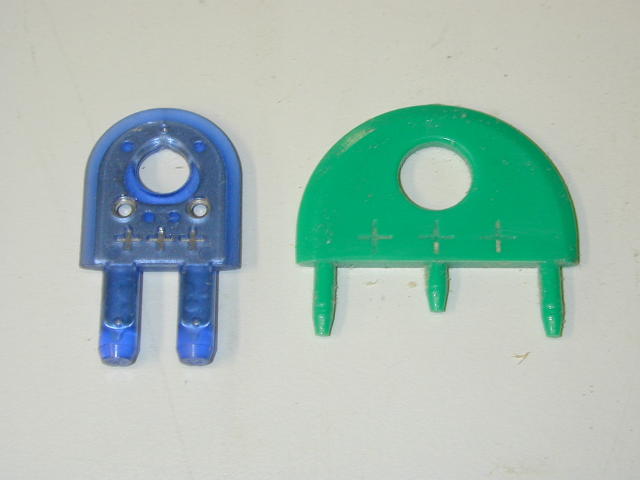 So
what's different about the MJ Splitter Pro? The first thing you notice is
the size, the Pro is smaller in length than the original (Pro is blue splitter
in pic at left) and its pins are longer. The pins are also much thicker
than the original and at 3/16" diameter (right) they are not going to pull
out through a 1/8" kerf.
So
what's different about the MJ Splitter Pro? The first thing you notice is
the size, the Pro is smaller in length than the original (Pro is blue splitter
in pic at left) and its pins are longer. The pins are also much thicker
than the original and at 3/16" diameter (right) they are not going to pull
out through a 1/8" kerf.
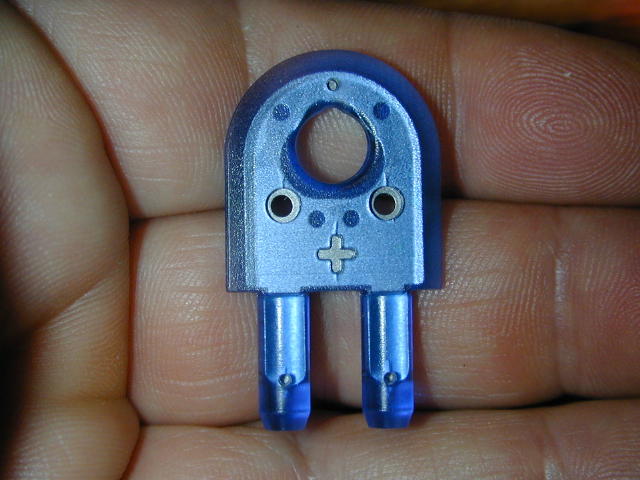
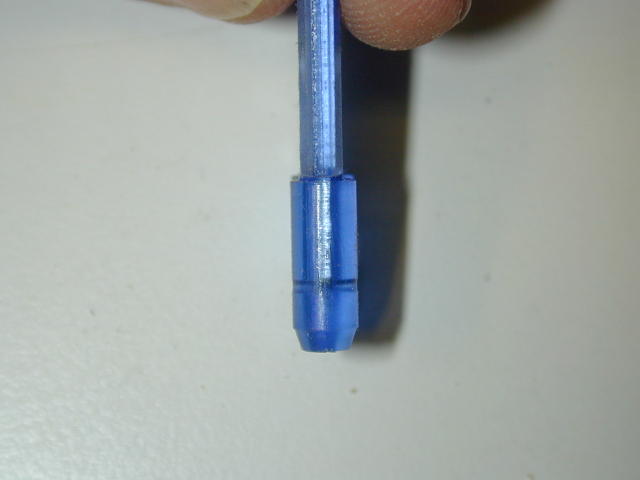
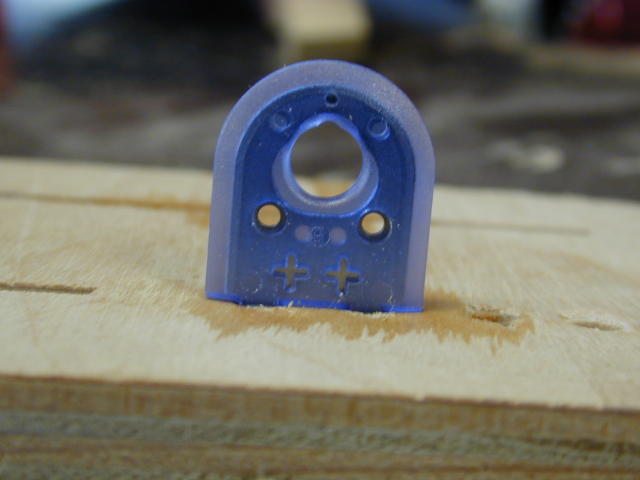
But the big difference is the material the pins are made of...stainless steel. In the photo at right you can clearly see the stainless steel core of the splitter. The outer material is a translucent blue plastic.
These splitters appear to be significantly stronger than the previous ones and are designed to be very difficult to be wrenched out of the splitter. There are a couple of reasons they will be difficult for a pinching board to pull them out. First off when a board closes up on the splitter you really should stop cutting but if you were to continue to force the board through the blade the two stainless steel pins will resist bending and keep the splitter in place. If you enlist the aid of a buddy to help you continue to force the board through the cut and you do somehow get the pins to loosen because the pin is larger than the saw kerf it will not pivot into the kerf. It is going to be very hard to cause these splitters to come out of your insert.
Installing the Pro Splitter on your Zero Clearance Insert:

 For
instructions on making a zero clearance insert (ZCI) refer to my
DIY instructions.
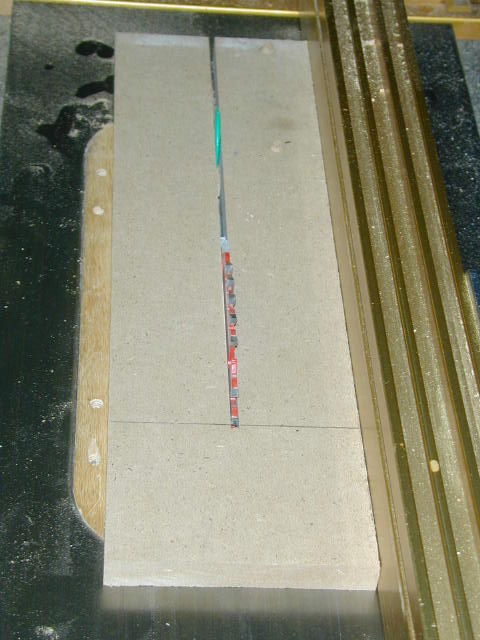
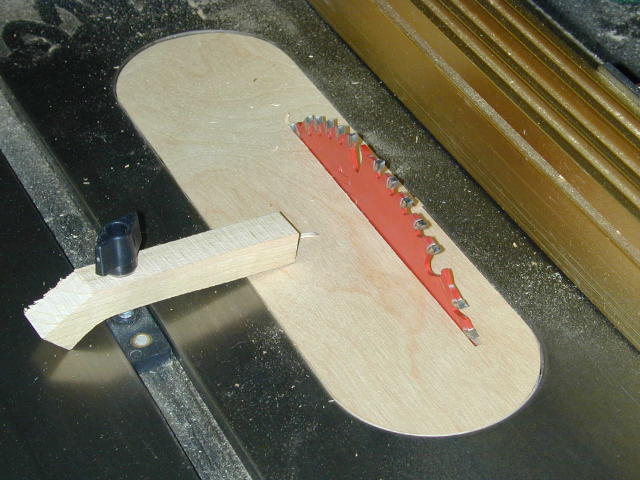
We first need to construct the template and for that you need a piece of MDF or
Plywood that measures 4-1/2x15x1/2". I prefer MDF because it is flatter
and more stable than plywood. Once you rip your 4-1/2" piece and mark a
line 3" from one end, you set the fence to 2" and rip to the line (left).
Do not move the fence until we are done installing the splitter.
For
instructions on making a zero clearance insert (ZCI) refer to my
DIY instructions.
We first need to construct the template and for that you need a piece of MDF or
Plywood that measures 4-1/2x15x1/2". I prefer MDF because it is flatter
and more stable than plywood. Once you rip your 4-1/2" piece and mark a
line 3" from one end, you set the fence to 2" and rip to the line (left).
Do not move the fence until we are done installing the splitter.
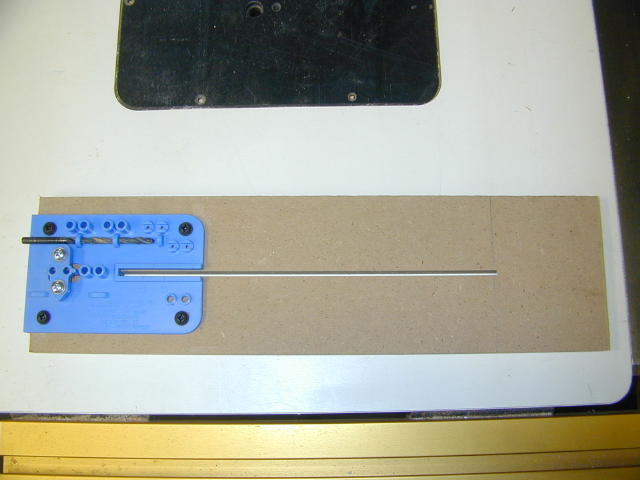
Unplug the saw and place your drill guide on the MDF with it flush to the rear and right side of the MDF. Push on the finger tabs to keep the drill guide flush with the right side of the kerf and install two wood screws on the right side of the drill guide (right).
 The
next step is to install drilling adapter onto the drill guide if it didn't come
that way from Micro Jig. Leave the screws loose. Gently apply pressure to
the adapter and make it flush with the left side of the kerf being careful not
to open the kerf by applying too much pressure, and tighten the screws (left).
The
next step is to install drilling adapter onto the drill guide if it didn't come
that way from Micro Jig. Leave the screws loose. Gently apply pressure to
the adapter and make it flush with the left side of the kerf being careful not
to open the kerf by applying too much pressure, and tighten the screws (left).
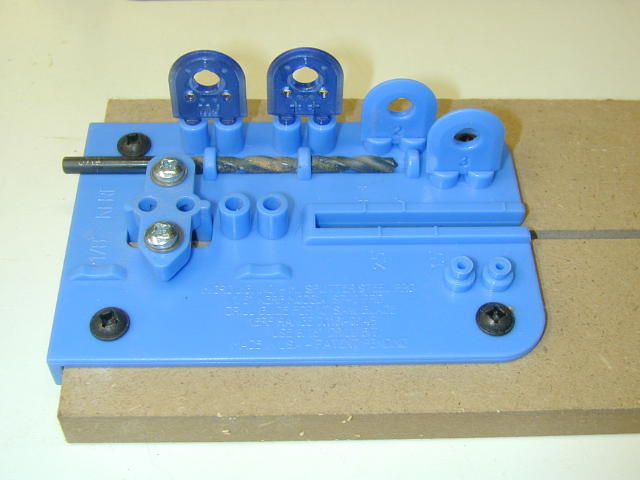
Install the last two wood screws on the left side of the drill guide and your template should look like the one on the right.
 In
order to install two MJ Splitters you need 2" of ZCI material behind the blade.
On my Jet contractors saw with the blade fully raised I can only fit one
splitter. But I like to make my splitters for different height blades and
in this case, a 1 1/2" blade height provides plenty of room to install two
splitters. I use this height for cutting 4/4 wood. The first thing I
did was grab a new ZCI blank and raise the blade through it to a height of 1
1/2" and unplugged the saw. I installed the template on top of the ZCI and
aligned the blade to the 1.5" mark (right).
In
order to install two MJ Splitters you need 2" of ZCI material behind the blade.
On my Jet contractors saw with the blade fully raised I can only fit one
splitter. But I like to make my splitters for different height blades and
in this case, a 1 1/2" blade height provides plenty of room to install two
splitters. I use this height for cutting 4/4 wood. The first thing I
did was grab a new ZCI blank and raise the blade through it to a height of 1
1/2" and unplugged the saw. I installed the template on top of the ZCI and
aligned the blade to the 1.5" mark (right).

 Clamping
the template in place I used the supplied drill bit and drilled the 4 pin holes
(left).
Clamping
the template in place I used the supplied drill bit and drilled the 4 pin holes
(left).
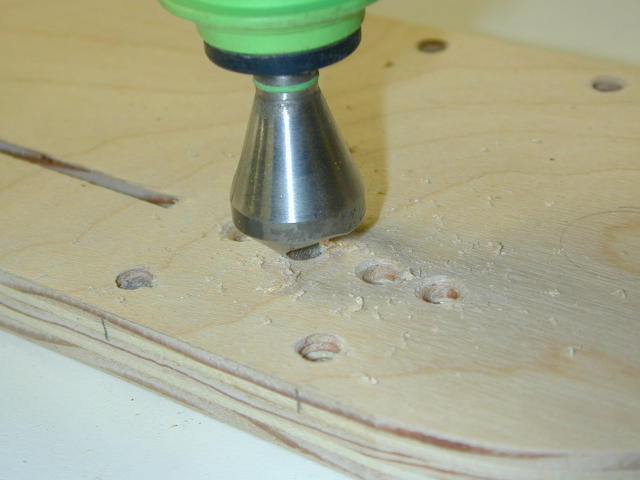
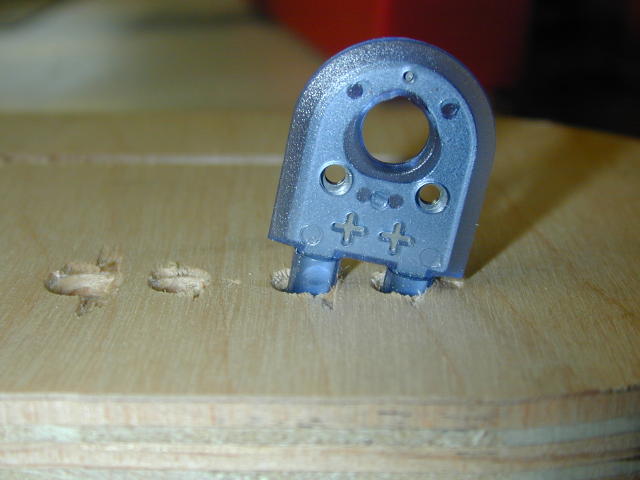
Now remove the template and countersink the holes about 1/32" (right).
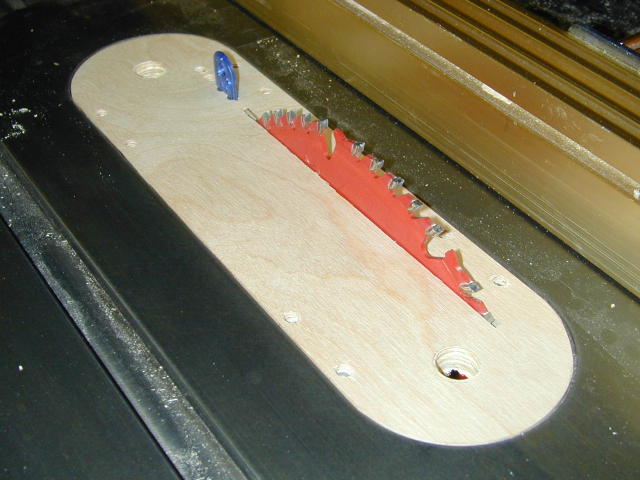
 There
you go, a ZCI with the new MJ Splitter Steel PRO installed.
There
you go, a ZCI with the new MJ Splitter Steel PRO installed.
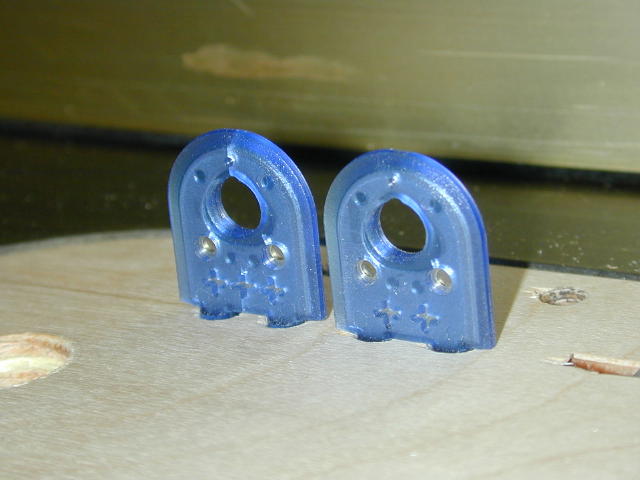
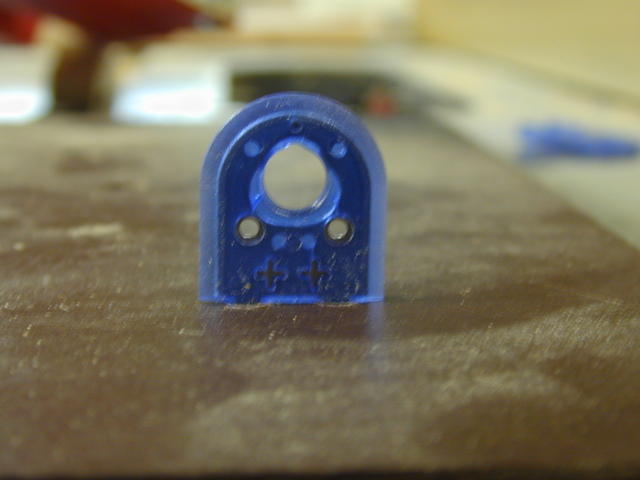
But we drilled four holes. When you have the room (2") you can run two splitters or one splitter and one Kerf Keeper. Let's talk about two splitters first. The reason for installing tow splitters is to allow the splitters to apply a slight pressure on each each side of the kerf. Each splitter has a different number of "+" (plus) signs which represent an offset from the center line.
Why would you need offsets? Well, there
are a couple of reasons. When you use the MJ Splitter Steel PRO it is best
to have the splitter apply just a little pressure on the keeper piece pushing it
towards the fence. Because it is possible depending on how careful you are
to have the jig or the ZCI move or not align perfectly with each other when you
drill the holes, you are provided 4 different offsets, .000 through .009" so
that
you can fine tune your setup.
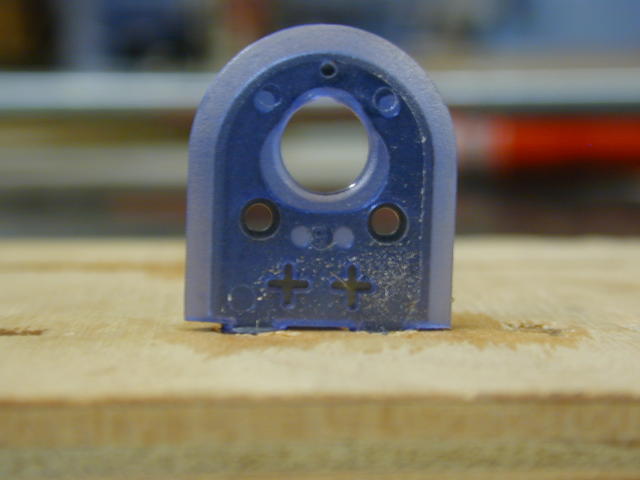
 Set
our first splitter (immediately behind the blade) so that it exerts a slight
pressure on the keeper piece towards the fence. As I said above you may need either zero,
one or two pluses to accomplish this. Each plus "+" represents .003".
Now set the second splitter to apply a slight pressure away from the blade.
You wont actually be able to see the kerf being spread but you may feel it.
Example; Let's say in order to get the first splitter to apply pressure you used
a "+"facing the fence, then your second splitter might need to be a "++" or a
"+++" facing away from the fence. What this configuration accomplishes is two fold. First if pushes the
keeper up against the fence. Secondly the rear splitter puts slight
pressure on the kerf and keeps it from grabbing the first splitter in case of a
warp. What should happen if a board starts to pinch is the the right side
of the kerf will pinch on the right side of the first splitter and the left side
of the kerf will pinch on the left side of the rear splitter thus making it even
more difficult to cause one of the MJ Splitters to get pried out of the insert.
Set
our first splitter (immediately behind the blade) so that it exerts a slight
pressure on the keeper piece towards the fence. As I said above you may need either zero,
one or two pluses to accomplish this. Each plus "+" represents .003".
Now set the second splitter to apply a slight pressure away from the blade.
You wont actually be able to see the kerf being spread but you may feel it.
Example; Let's say in order to get the first splitter to apply pressure you used
a "+"facing the fence, then your second splitter might need to be a "++" or a
"+++" facing away from the fence. What this configuration accomplishes is two fold. First if pushes the
keeper up against the fence. Secondly the rear splitter puts slight
pressure on the kerf and keeps it from grabbing the first splitter in case of a
warp. What should happen if a board starts to pinch is the the right side
of the kerf will pinch on the right side of the first splitter and the left side
of the kerf will pinch on the left side of the rear splitter thus making it even
more difficult to cause one of the MJ Splitters to get pried out of the insert.


The next configuration is to use the second set of holes for the Kerf Keeper (KK). The KK's job is to wedge itself in a pinched board so that you can finish the cut or give you time to turn off the saw and make it easier to remove the work from the saw. First we the MJ Splitter Steel Pro as described above making note of what its offset and orientation was. In the photo at left it is a "++" facing away from the fence. We then install the adapter sleeves into the ZCI (also at left) and then the same sized (#2) KK itself (right).
 If a board pinches up on the Splitter and
KK, the slightly undersized KK will get yanked out of the ZCI and travel with
the board keeping the kerf open.
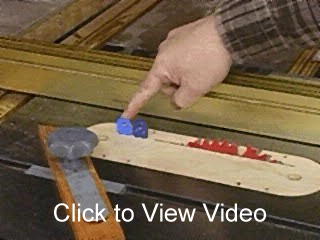
Here's a short
demonstration video.
If a board pinches up on the Splitter and
KK, the slightly undersized KK will get yanked out of the ZCI and travel with
the board keeping the kerf open.
Here's a short
demonstration video.
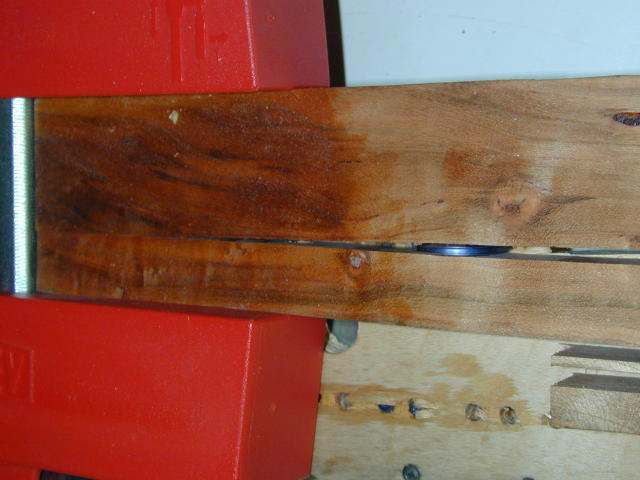
Testing: Trying to yank out the MJ Steel PRO Splitter
So ok, the design looks great but how will it perform when a warping board grabs a hold of it? Not wanting to start ripping my cherry until I found a case hardened piece that would pinch the kerf, I decided to create the situation artificially. What I did was to cut a kerf in a piece of plywood and use a Bessey clamp to close the kerf around the splitter to simulate a pinch. I then tried to force the board as if I was pushing it through the blade. I pushed on it and then hit it with a dead blow hammer. Click on the pic below to see the results.
Another thing I did was to whack the splitter with a board. I installed the splitter and took a 5 foot-ish long board and whacked it by standing at the left side of my saw and swinging the board in a pivoting manner so that it would contact the splitter at an angle on its rear side. I hit it a number of times with quite a bit of force trying to simulate sliding a piece of wood onto your saw table and impacting the splitter. Inspection of the splitter revealed no damage.
UPDATE 9/9/06
More testing. My earlier testing showed that the real weak point was the insert itself, not the splitter so I decided to experiment with CyanoAcrylates (super Glue). In woodturning we use thin CA glue to, among other things, harden the piece we are turning so I thought I'd try it on my inserts.
 The
first thing I did was to take a piece of the 1/2" birch ply that I use for ZCI's
and drilled 2 sets of holes. I flooded the first set with CA. I made sure
I soaked the area and let it cure for about 30 minutes.
The
first thing I did was to take a piece of the 1/2" birch ply that I use for ZCI's
and drilled 2 sets of holes. I flooded the first set with CA. I made sure
I soaked the area and let it cure for about 30 minutes.
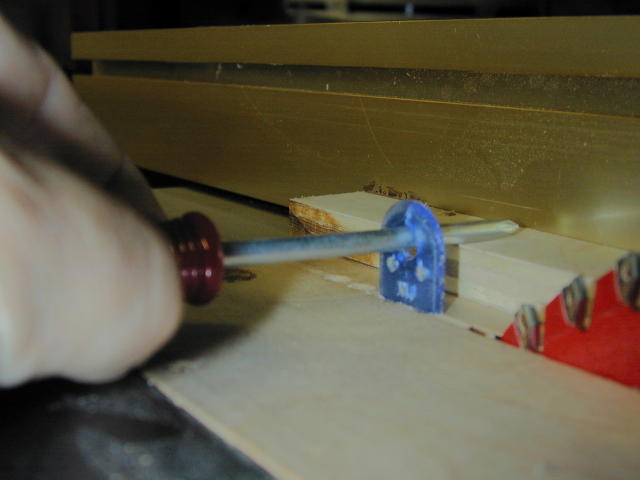
With the untreated set I inserted and removed the splitter 50 times utilizing
the method I've talked about in the past of using a piece of 1/2" material as a
leverage point to the splitter can be extracted straight up. (see pic at right).
The result was that after 50 removals the splitter still squeaked upon removal
and though it came out with less force, I still couldn't not grab it with my
hand and pull it out and there was no perceptible loose fit. I am now not
concerned with loosening up the holes by just the removal/replacement of the
splitter if my method is used for removal.
As for the set of holes flushed with CA, I had to bang the splitter in and it
was darn tight, very hard to remove. Banding the splitter with a hammer is
probably not good for it so I took my drill and gently ran the bit through the
holes to clean them out. I did do the repeatability test and on the 50th
insertion, performed my new modified tests.

 I
initially tried the testing method I used originally and no matter what I did,
CA the holes, glue the splitter in, the splitter
would still come out. The picture at left shows that even the glued in splitter
came loose from the impact of
the hammer. This caused me to question my test methods. Further
supporting my concern was the fact that when I glued in the splitter, in order to remove it I had to place the ZCI in a vise and pry the splitter out. The splitter would not come out,
rather it broke and left the plastic molding in the ZCI (right). The force
required to remove that splitter was very significant. There was no way
this splitter should be loosening....my test must be flawed.
I
initially tried the testing method I used originally and no matter what I did,
CA the holes, glue the splitter in, the splitter
would still come out. The picture at left shows that even the glued in splitter
came loose from the impact of
the hammer. This caused me to question my test methods. Further
supporting my concern was the fact that when I glued in the splitter, in order to remove it I had to place the ZCI in a vise and pry the splitter out. The splitter would not come out,
rather it broke and left the plastic molding in the ZCI (right). The force
required to remove that splitter was very significant. There was no way
this splitter should be loosening....my test must be flawed.
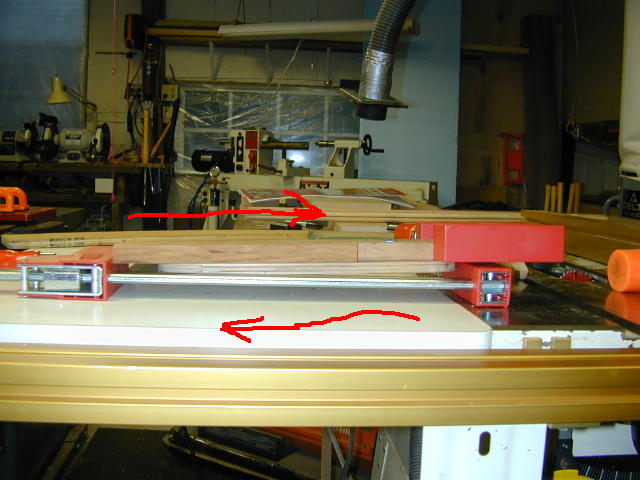
So I examined my test and realized that I was putting unrealistic force on the splitter by clamping the wood right on the splitter. In practice the wood would never come close to applying the force I could with the Bessey clamp. I was clamping so hard that the plywood was deforming around the splitter, in effect creating a notch for the splitter and assuring that any movement of the plywood would take the splitter along with it So I made three changes. I switch my artificial kerf piece to a chunk of cherry and I clamped the kerf closed behind the splitter...just like what would happen if the wood warped closed (pic on right). The third change was how I moved the wood. Instead of striking it with a hammer, I used another clamp to move the kerf. I did this by placing one end of the clamp against the ZCI and the other end against the artificial kerf. With this setup I was able to use the clamp to create a shear action which better simulates forcing the pinched wood through the cut (pic on left). The force required to move the wood feels as strong as the original method.
 First,
using newly drilled holes in Home Depot birch plywood neither the MJ Steel PRO
or the Original MJ Splitter remained inserted. The Steel PRO, shown at
left cocked but that's as far as it moved before it appeared to stabilize.
Now I don't know if it would only move that far if you were pushing 5' worth of
tight kerf. I know that what I do as soon as the board pinches is to stop
cutting and take the board to the band saw where I can safely finish the cut.
I don't think it is safe, no matter what splitter, to force a warping board
through the cut. Ok soap box off. On the right is the original MJ
splitter and as you can see it bent pretty bad and I had to stop the test or it
would have ripped out completely.
First,
using newly drilled holes in Home Depot birch plywood neither the MJ Steel PRO
or the Original MJ Splitter remained inserted. The Steel PRO, shown at
left cocked but that's as far as it moved before it appeared to stabilize.
Now I don't know if it would only move that far if you were pushing 5' worth of
tight kerf. I know that what I do as soon as the board pinches is to stop
cutting and take the board to the band saw where I can safely finish the cut.
I don't think it is safe, no matter what splitter, to force a warping board
through the cut. Ok soap box off. On the right is the original MJ
splitter and as you can see it bent pretty bad and I had to stop the test or it
would have ripped out completely.

So next I flooded the holes on an old ZCI and a new ZCI. The new CA'ed holes worked great, the splitter did not move (left). The used ZCI with holes worn from some previous testing did ok, but the splitter did move a bit (right). This was very promising. As I suspected the weak point in this was the ZCI material and the CA seems to increase the hardness of the plywood considerably.
In order to confirm again the material of the ZCI being important, I drilled the holes in a piece of 1/4" phenolic WITHOUT CA (left). As you can see it survived the test without a problem confirming that the harder the ZCI material the better the splitters work.
The last test I did was to take that new ZCI from the previous test and insert and remove the splitter 50 times. On the 50th insertion I performed the test and it passed without moving or cocking. I then reverted back to my initial hammer test with the only difference being that I clamped the kerf closed behind the splitter and not in it. I applied about 10 blows and moved the kerf about 5 inches. The picture at right shows the results, the splitter moved about .022. I feel these tests using CA to harden the holes were successful.
Wait, we're not finished yet. I also mounted the Steel PRO in Ash and Cherry and in both cases, without the CA, the splitters passed my test. Additionally gluing in the original MJ Splitter with the CA allowed it to pass the test as well.
So my conclusion is that if you make your insert out of soft material like plywood you should flood the holes with CA to harden the material and then lightly pass the bit through them. If you make your insert out of hardwood then CA is not necessarily required but it cant hurt especially if you move it between inserts often. I did test with MDF and while it passed the test when using CA, I'm not convinced as to its long term serviceability. I'd rate it as the least desirable material to make the insert out of if you plan on using a Micro Jig splitter.
As you can see from the test, the Micro Jig Steel PRO Splitter System is an improvement to the original version. The number one complaint I've heard about the original MJ Splitter was that it could break and come out of the ZCI when pinched. I believe I've demonstrated that under normal use the new MJ Steel PRO is a heavy duty splitter and is not going to get yanked out of the insert unless the operator applies extraordinary force to the warping board. Look for this splitter to be released before the end of October.
Copyright © 2006, Bill Esposito.
All Rights Reserved.
 Click to
view video of test.
Click to
view video of test.