Page 1 of 2
Dust Be Gone
Overhead Blade Guard
and Dust Collector
by
Bill
Esposito
20 June 2005

I had a good time with product review because I got the chance to work
with Steve the designer and owner of Segi
Inc. Steve has been manufacturing and selling these locally when I
got an email from OnlineToolReviews.com
asking me to perform the review. What was fun was that I got to give some
input into what I liked and disliked and Steve is going to incorporate
some of my ideas into the product. The Dust Be Gone was provided by Segi
Inc for this review.
As with all my reviews I'll walk you through installation and provide you
with plenty of close up photographs. Just click on any picture to enlarge
it.
What's in the box:
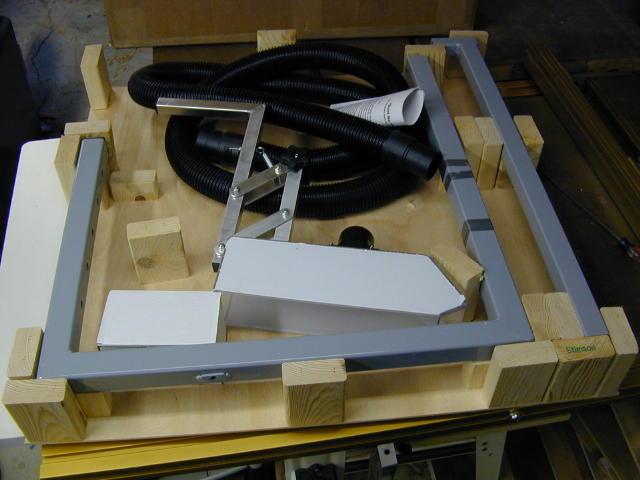 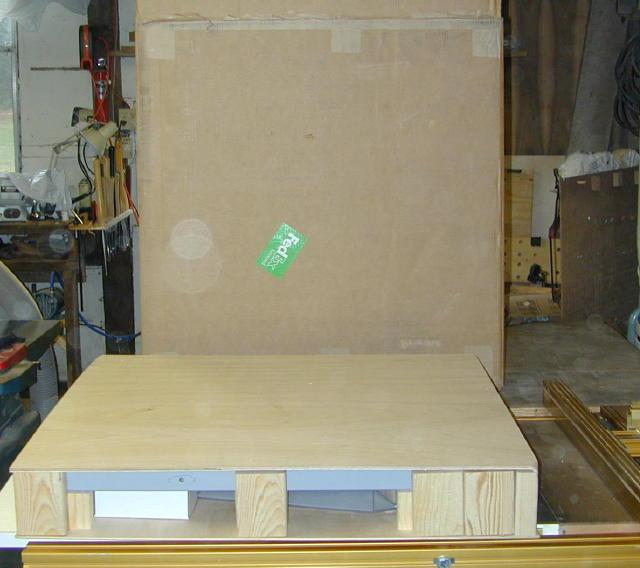 The Dust Be Gone is constructed
out of heavy square steel tubing and as such needed a sturdy box for shipment.
Since the Dust Be Gone hasn't yet become a high volume mail order product,
the packing is quite labor intensive. Steve has since found high strength
cardboard to substitute for the 2x4 pieces which should both make packing
easier as well as lower the shipping weight. Because the package is designed
for FedEx shipping, current shipping is around $25 which isn't bad for
the weight and size. The Dust Be Gone is constructed
out of heavy square steel tubing and as such needed a sturdy box for shipment.
Since the Dust Be Gone hasn't yet become a high volume mail order product,
the packing is quite labor intensive. Steve has since found high strength
cardboard to substitute for the 2x4 pieces which should both make packing
easier as well as lower the shipping weight. Because the package is designed
for FedEx shipping, current shipping is around $25 which isn't bad for
the weight and size.
 The Dust Be Gone includes everything you'll need to
install it right down to the 2.5" vacuum hose. The guard itself is
protected with stick on paper and all steel frame parts are powder coated
with end caps where necessary. Hardware includes nuts and bolts, tie wraps
and knobs. The guard comes in 30" and 50" models and both are
adjustable within their size ranges. The Dust Be Gone includes everything you'll need to
install it right down to the 2.5" vacuum hose. The guard itself is
protected with stick on paper and all steel frame parts are powder coated
with end caps where necessary. Hardware includes nuts and bolts, tie wraps
and knobs. The guard comes in 30" and 50" models and both are
adjustable within their size ranges.
Installation:
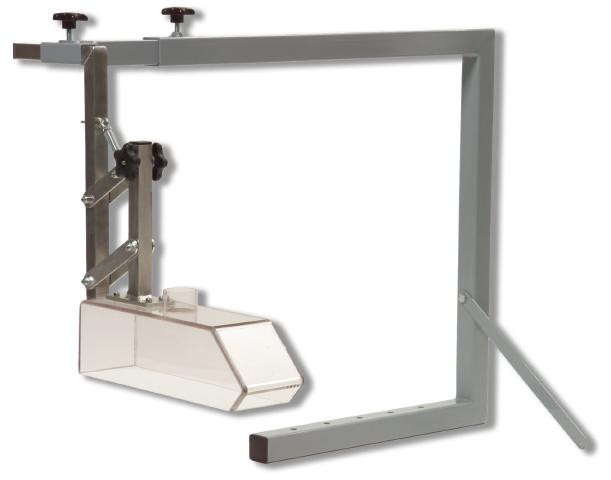
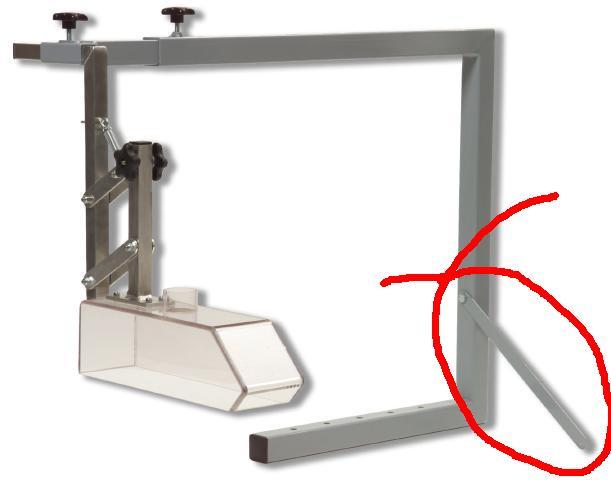 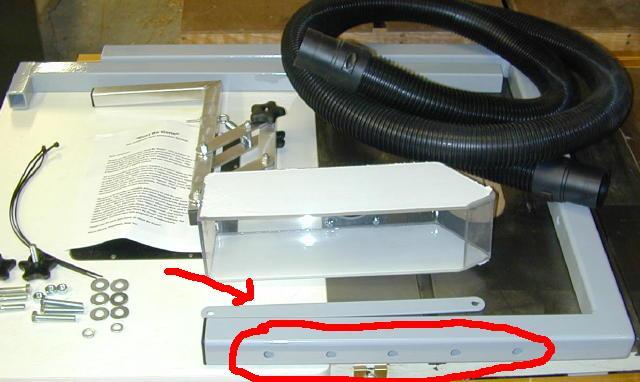 The
Dust Be Gone is designed to be mounted on a rear fence rail or a right
side extension table. The bottom of the main frame has 5 holes (circled
in pic at left) to facilitate this. The frame also has a stabilizer bar
(arrow at left) which is used to support the frame and keep it square to
the saw. You must use this bar for stability and it requires that you also
have a right side extension table or cross support between your rails.
In the photo at right you can see what I mean, the bar supports the frame
structure. The
Dust Be Gone is designed to be mounted on a rear fence rail or a right
side extension table. The bottom of the main frame has 5 holes (circled
in pic at left) to facilitate this. The frame also has a stabilizer bar
(arrow at left) which is used to support the frame and keep it square to
the saw. You must use this bar for stability and it requires that you also
have a right side extension table or cross support between your rails.
In the photo at right you can see what I mean, the bar supports the frame
structure.
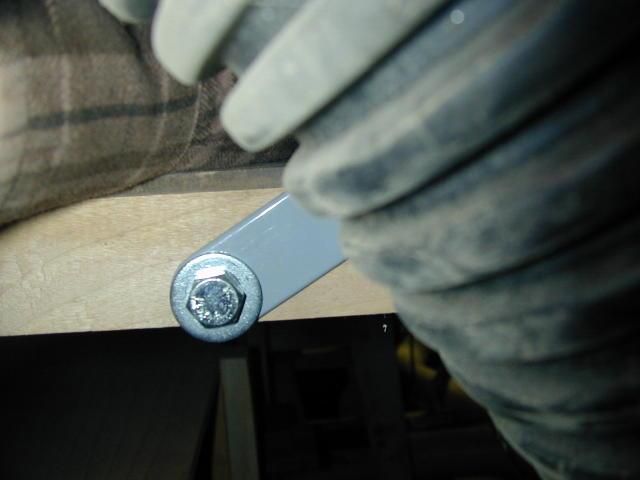
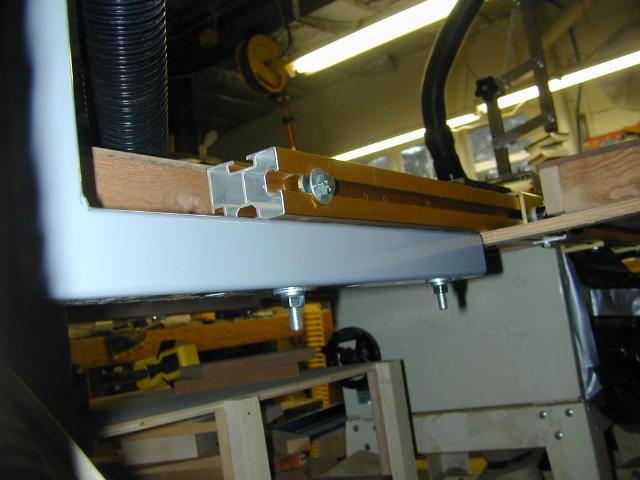 I installed the frame on my Incra
TS-III. I simply inserted a couple of the supplied bolts into the bottom
T-Slot in the Incra's rear rail and bolted the frame to the rail (pic at
left). I installed the frame on my Incra
TS-III. I simply inserted a couple of the supplied bolts into the bottom
T-Slot in the Incra's rear rail and bolted the frame to the rail (pic at
left).
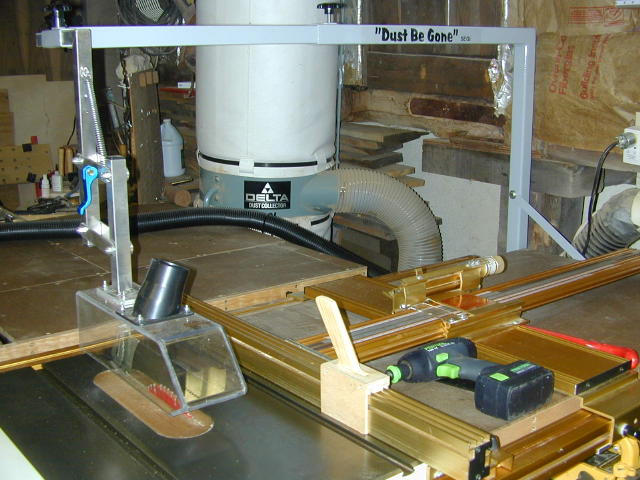
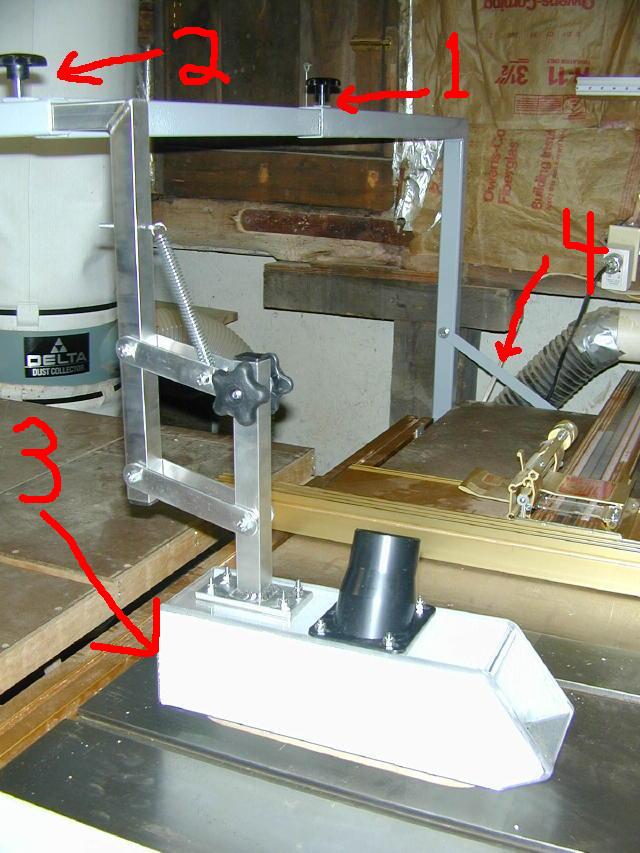 The next step was to insert the extension arm into
the main frame and add the knob (#1 in pic at left). Then I inserted the
guard assembly and the knob at #2 in the picture. Loosening the knobs on
the scissor assembly I lowered the guard until it was just above the table
( #3) because I'm going to use its position to align the main frame. The next step was to insert the extension arm into
the main frame and add the knob (#1 in pic at left). Then I inserted the
guard assembly and the knob at #2 in the picture. Loosening the knobs on
the scissor assembly I lowered the guard until it was just above the table
( #3) because I'm going to use its position to align the main frame.
Attaching the stabilizer bar to the main frame I drilled a hole in the
table and secured the bar to the table using the supplied hardware. To
determine where to drill the hole for the stabilizer bar, I moved the main
frame assembly until the plastic guard was parallel to the table saws surface.
Once I was happy with the alignment I drilled the hole and connected the
bar (#4 and below left).
 Now if the rails and saw table are all square to
each other, everything will still be square. If you have to move much more
than a skosh you should check your rails for alignment to your tablesaw.
On a T-Square fence it shouldn't matter if they're a bit off but on an
Incra it is important. Mine was fine. Now if the rails and saw table are all square to
each other, everything will still be square. If you have to move much more
than a skosh you should check your rails for alignment to your tablesaw.
On a T-Square fence it shouldn't matter if they're a bit off but on an
Incra it is important. Mine was fine.
If all went well, and it has been quite simple thus far, you should be
ready to install the dust hose.
At this time I'll point out a change that Segi is going to make in production.
The two knobs on the top of the frame in the photo at right. The one farthest
right is for adjusting the extension arm and the one to the left for positioning
the guard front to back. I found them uncomfortable to reach so the extension
arm knob is being moved to the front and the guard knob to the left side.
That should save a couple of inches of reach.
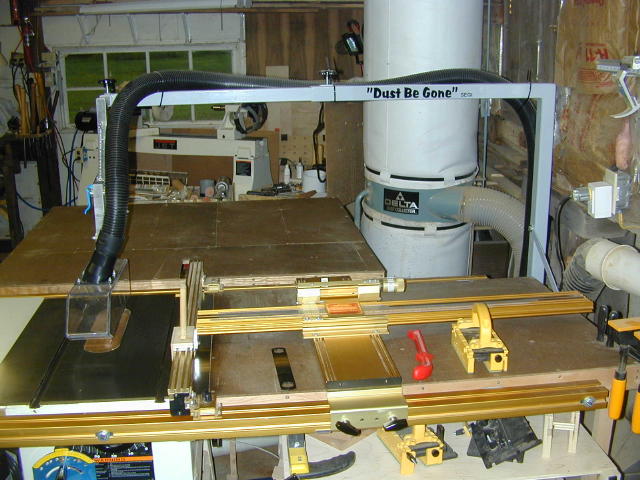 The last step is the dust hose. Just run it along
the frame and attach it with the included tie wraps. Another change in
production will be replacing the tie wraps with something reusable like
velcro straps. That way it will be easier when you have to move the guard
out of the way when using a tenoning jig or the like. The last step is the dust hose. Just run it along
the frame and attach it with the included tie wraps. Another change in
production will be replacing the tie wraps with something reusable like
velcro straps. That way it will be easier when you have to move the guard
out of the way when using a tenoning jig or the like.
Ok, we're ready to make some...umm I mean catch some saw dust. But first
let's look at some of the Dust Be Gone's features and construction.
[Page 1] [Page 2]
[Home]
20 June 2005
Copyright © 2005 , Bill Esposito.
All Rights Reserved.
|