
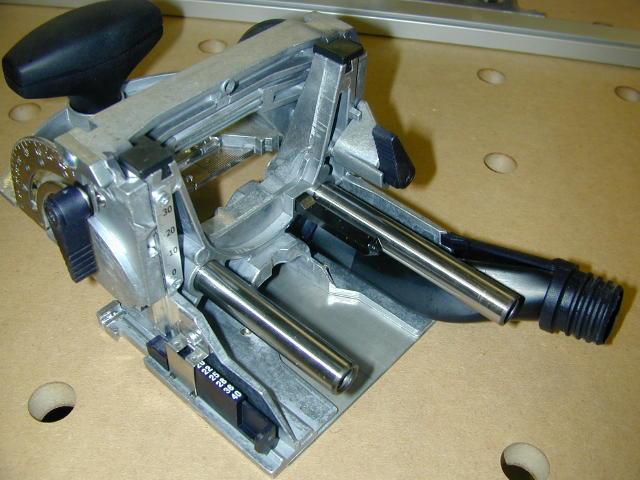
Festool Domino
DF 500 Q
Domino Joiner![]() Set
Set
Cutter & Domino Tenon Assortment Systainer
by
18 Feb 2007
The Domino Tenons:
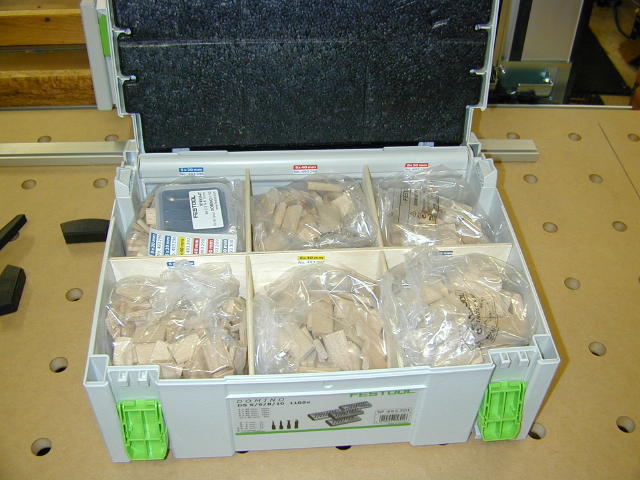

The Cutter & Domino Tenon Assortment really should be your first accessory purchase for the Domino. In this kit you get a set of all four cutters; 5mm, 6mm, 8mm and 10mm, a number 2 Systainer which is divided and labeled into six compartments (pic right) and 1105 domino tenons. The tenons include 600 each of the 5x19x30mm, 190 each of 6x20x40mm, 130 each of 8x22x40mm, 100 each of 8x22x50mm and 85 each of 10x24x50mm. Festool also includes some spare labels in case the labels wear off from the plywood dividers or for use when you make more tenon storage.
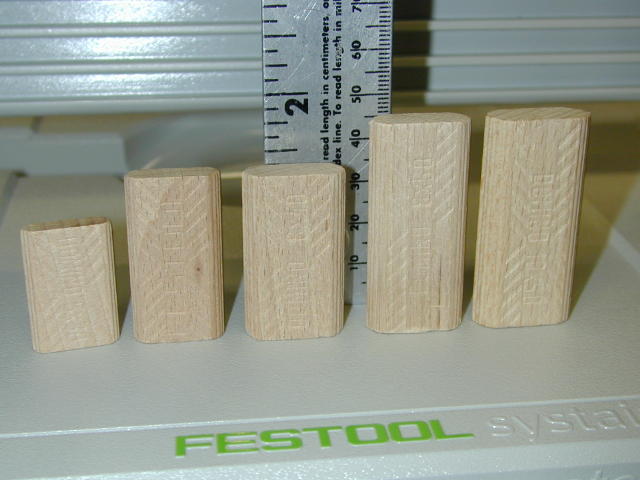
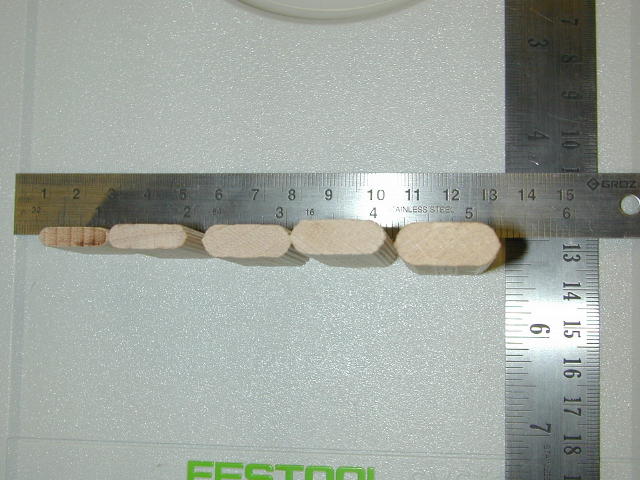
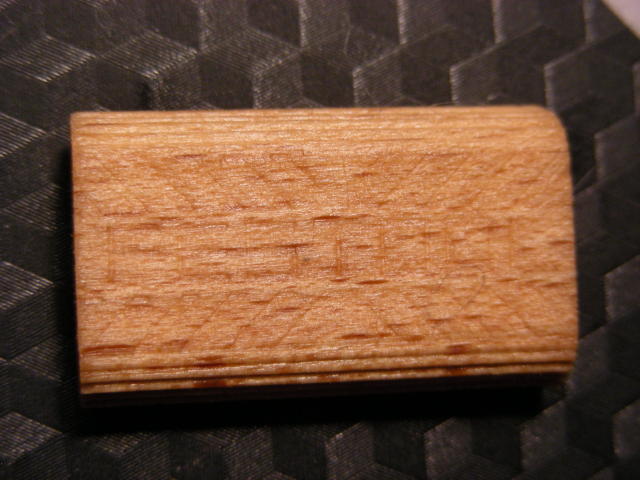
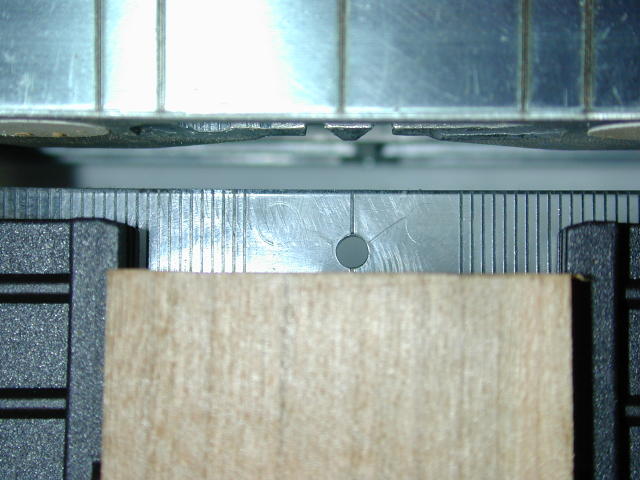
Here they are. The larger ones are pretty substantial. I see myself using the 10x50 quite often. The 5x19x30mm tenon is thicker and will penetrate further than a 4x56x23mm #20 biscuit it will likely replace. The Domino tenons are made from solid birch and as such are dimensionally stable in comparison to compressed beech biscuits and should not be affected by the humidity in your shop. The tenons do have glue ribs on the long edges and embossed Festool branding and recesses which will expand once a wet glue hits them.
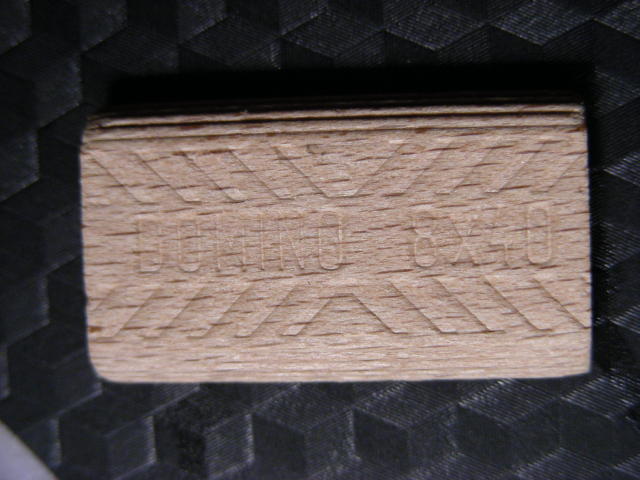
At left is a Domino tenon. It has side flue flutes and is embossed for both identification and to hold glue.
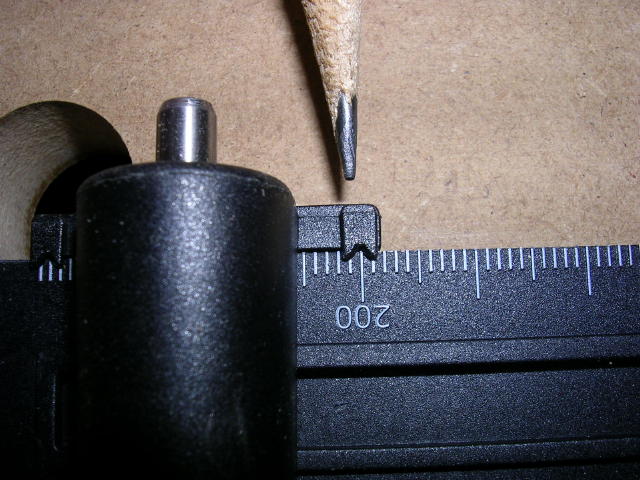
In an effort to find out how stable the Domino tenon is I submerged this tenon in a glass of water for about 15 hours. I measured its thickness before placing it in the water and it averaged 8.05mm. After 15 hours I removed it and measured it again, it measured 8.20mm on average. That is a growth of .15mm or .006". I'm not sure what this test proves or how I could equate 15 hours in water to the humidity in my shop but it does look to me that the tenon is dimensionally stable.
Changing the Bit
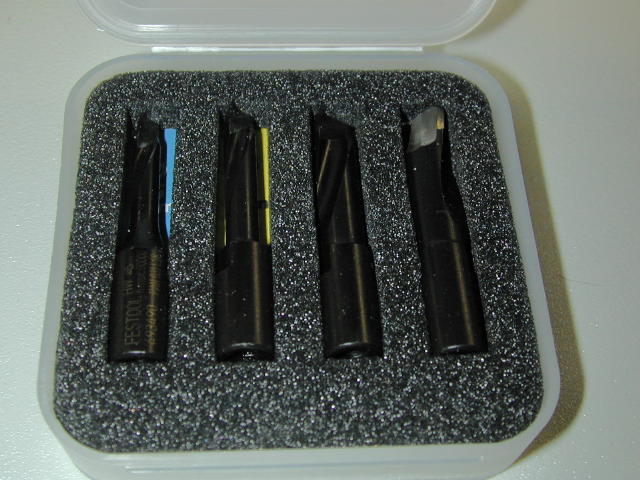
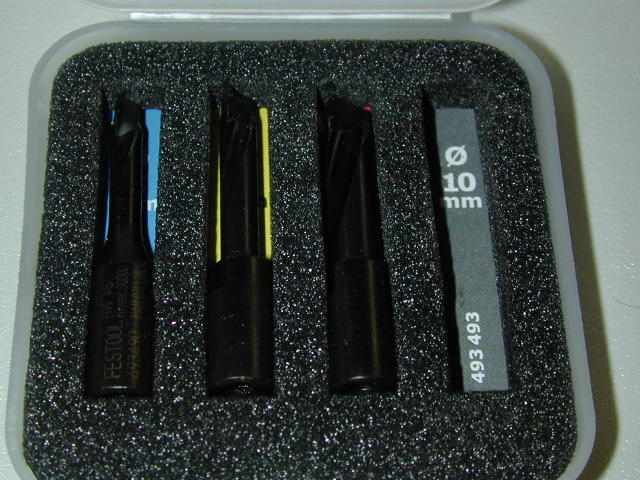
Included with the tenon assortment above is a set of all four Domino bits. Again that's 5, 6, 8 and 10mm. The bits come packaged in a nice plastic case and even the case is labeled so that when you're searching the shop for that missing bit that you just had in your hand, you know which one you're looking for :).
The bits screw on to the drive shaft or arbor which is threaded for a M6 x 0.75 thread.
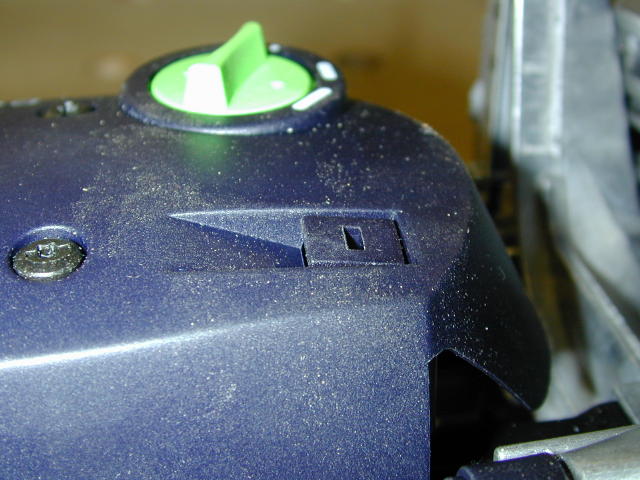
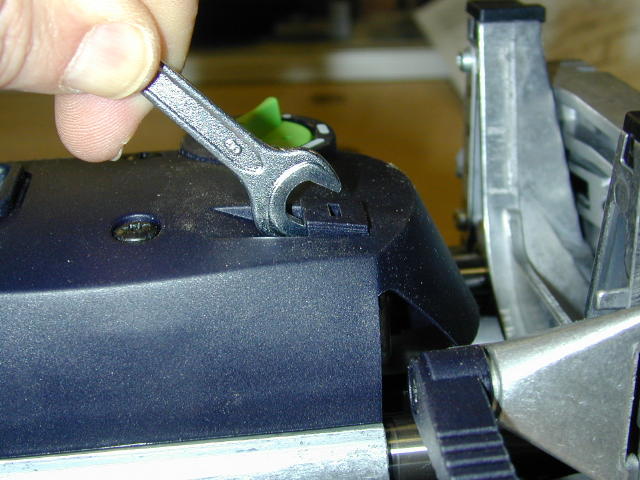
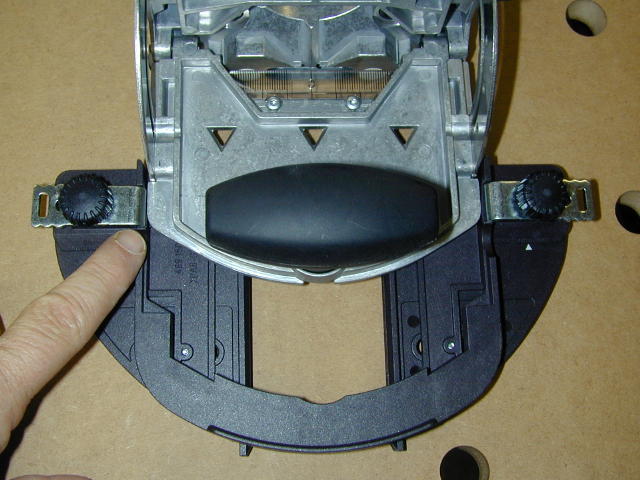
On the opposite side from the mortise width selector is the unlocking latch (photo left) There is a lever on the fence piece that passes beneath this latch and hooks on it so that the front fence cannot come loose from the Domino motor body. In order to change the bit we need to remove the front end so using the included bit wrench, gently pry up the latch (pic right). Just insert the wrench in the opening below the latch and pivot the wrench down. You'll hear it "click" and feel the motor body release and spring back away from the fence.
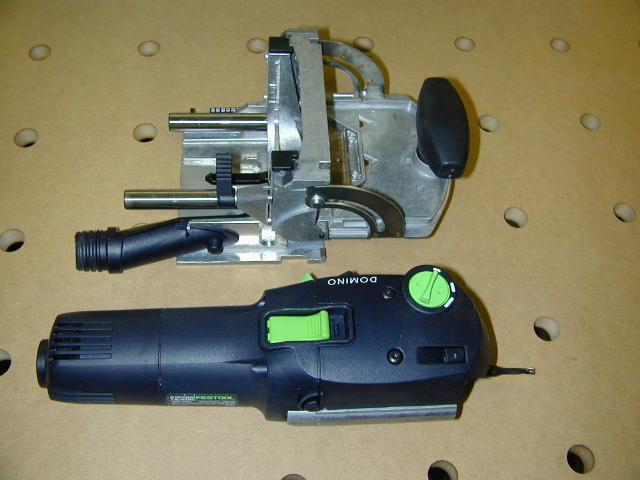
 Continue
to pull the motor body back away and apart from the front fence assembly.
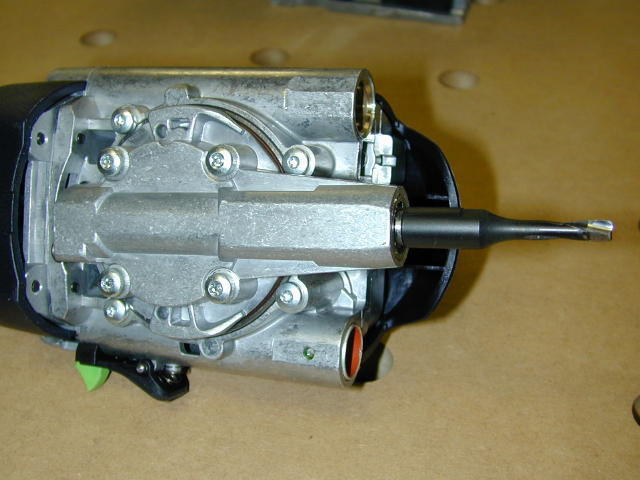
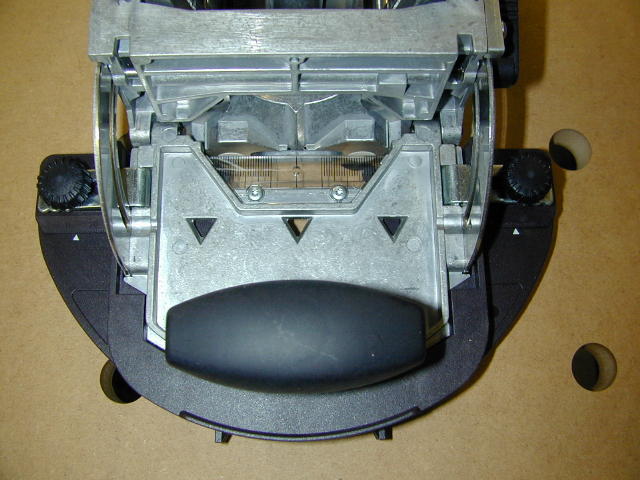
Before we change the bit let's turn in over and look at the bit mechanism
(right). If you double click on the photo at right a closer view will be
displayed where you can clearly see the bit swivel mechanism. It kind of
looks like a turret on a tank. The 5mm bit is installed in that photo.
Continue
to pull the motor body back away and apart from the front fence assembly.
Before we change the bit let's turn in over and look at the bit mechanism
(right). If you double click on the photo at right a closer view will be
displayed where you can clearly see the bit swivel mechanism. It kind of
looks like a turret on a tank. The 5mm bit is installed in that photo.
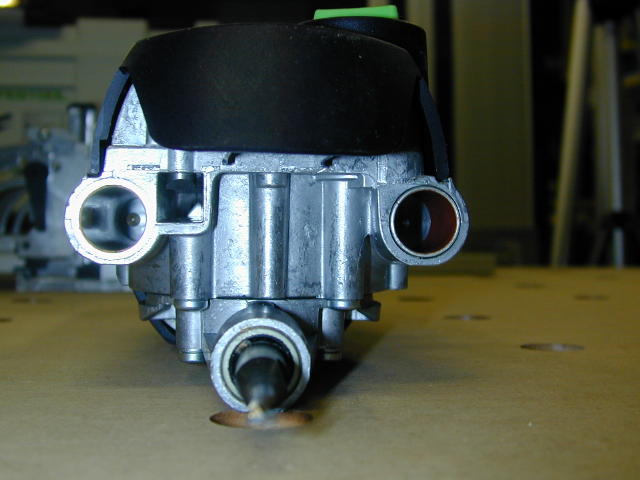
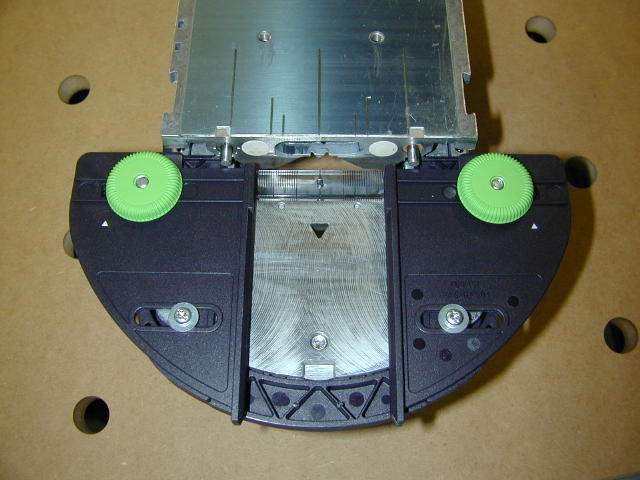
 And
here is a front on view of the motor body (left). The two holes are the front of
the motor body are the guide tubes for the posts on which the guide frame
(right) or what I call the fence assembly slides or more accurately plunges on.
When you assemble the body to the guide frame you just align it and slide the
posts into the tubes.
And
here is a front on view of the motor body (left). The two holes are the front of
the motor body are the guide tubes for the posts on which the guide frame
(right) or what I call the fence assembly slides or more accurately plunges on.
When you assemble the body to the guide frame you just align it and slide the
posts into the tubes.
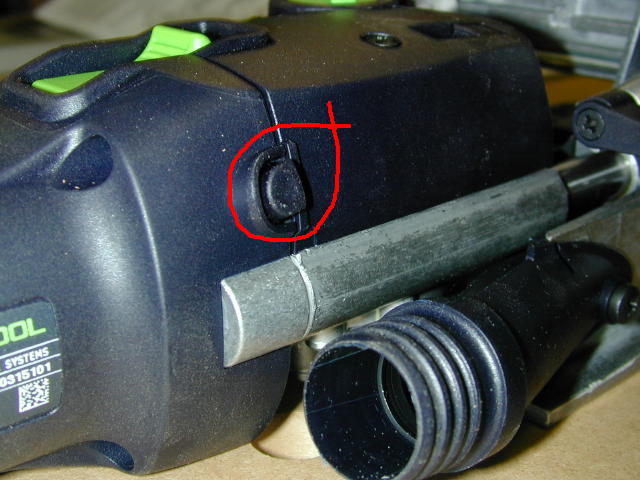
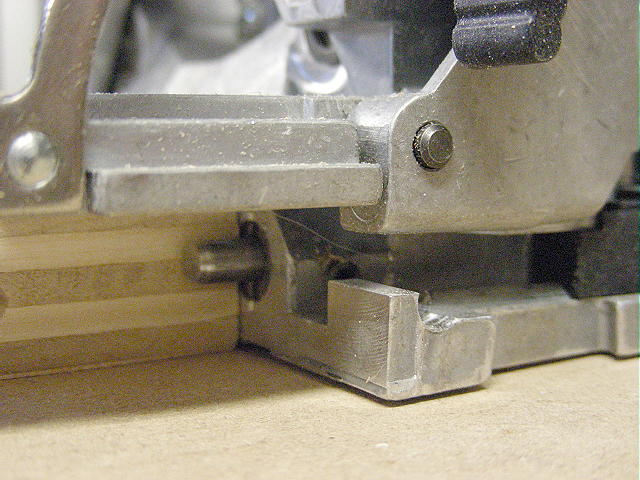
 Now
we're ready to change the bit. On the right side of the motor body is a
arbor lock (circled in red at left). We will need to grip the motor body
and depress this lock with one hand while we unscrew the bit using the wrench
with the other (right). This is the standard threading, clockwise to
tighten and counter clockwise to loosen. The flats for the wrench are
machined into the base of the bit.
Now
we're ready to change the bit. On the right side of the motor body is a
arbor lock (circled in red at left). We will need to grip the motor body
and depress this lock with one hand while we unscrew the bit using the wrench
with the other (right). This is the standard threading, clockwise to
tighten and counter clockwise to loosen. The flats for the wrench are
machined into the base of the bit.
The vacuum hose connection for dust collection can also be seen in the photo at left.

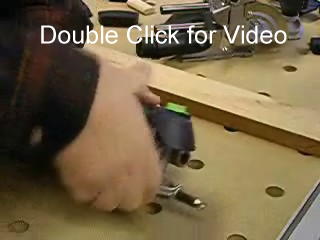 Once
the bit is loose you can unscrew it by hand as I'm doing in the photo at left.
The best way for me to explain this operation is with a short video where you
see the entire process and I even run the Domino so you can see the bit
movement. Just double click on the video link at right.
Once
the bit is loose you can unscrew it by hand as I'm doing in the photo at left.
The best way for me to explain this operation is with a short video where you
see the entire process and I even run the Domino so you can see the bit
movement. Just double click on the video link at right.
Accessories: Trim Stop
 The
Trim Stop another indispensable accessory. The Trim Stop is a fence
accessory that aligns and secures your work for an end grain mortise (bottom
view on left). If you cutting mortises in a bunch of rails and stiles then
this tool will greatly aid you in aligning the piece accurately and quickly.
The Trim Stop is plastic (reinforced Nylon I think), slips on to your Domino
fence, and creates adjustable fences perpendicular to your Domino face (right).
The
Trim Stop another indispensable accessory. The Trim Stop is a fence
accessory that aligns and secures your work for an end grain mortise (bottom
view on left). If you cutting mortises in a bunch of rails and stiles then
this tool will greatly aid you in aligning the piece accurately and quickly.
The Trim Stop is plastic (reinforced Nylon I think), slips on to your Domino
fence, and creates adjustable fences perpendicular to your Domino face (right).
To install the Trim Stop first make sure that you loosen and slide all the way back towards the outside of the Trim Stop the locking clips. My finger is pointing to one in the photo at left. Once that's done just slide the Trim Stop on to the Domino's fence until it is fully seated. Push the clips forward so that they lock into the recesses on the Domino fence (right) and tighten. Now the Trim Stop is ready to use.
These pictures demonstrate two way to align the measured center of the board width to the Domino. At left I'm using the scribe lines on the base of the Domino and at right I'm using the scale on the viewing window.
If you are milling an exact fit mortise where exact placement in both axis is required, I suggest you use the scale on the viewing window for the alignment simply because you can calibrate it to your specific Domino. Instructions for that procedure are included in Rick Christopherson's excellent Domino manual.
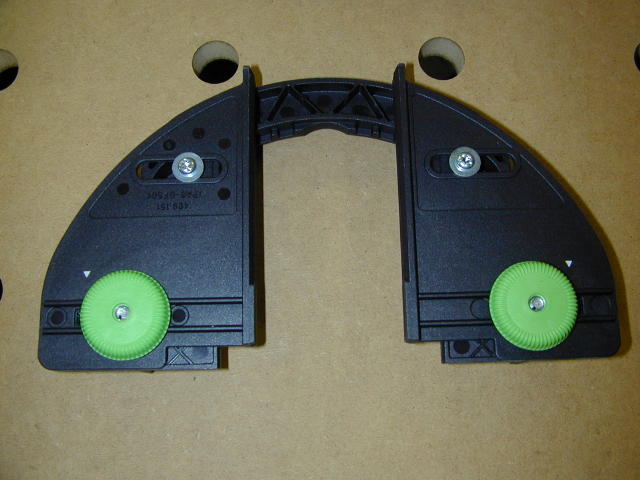
Accessories: Cross Stop

 The
cross stop is a handy accessory which allows you to place mortises on both
pieces of work without measuring and marking. The Cross Stop lends itself
to speedy, accurate panel glue-ups and is great to use when the actually
position of the mortise along the work isn't important, but the relative
position of the mortises on the two parts to be joined is what is important. Examples
of applications where it will be useful are panel glue-ups like I've already
mentioned and carcass and shelf assembly.
The
cross stop is a handy accessory which allows you to place mortises on both
pieces of work without measuring and marking. The Cross Stop lends itself
to speedy, accurate panel glue-ups and is great to use when the actually
position of the mortise along the work isn't important, but the relative
position of the mortises on the two parts to be joined is what is important. Examples
of applications where it will be useful are panel glue-ups like I've already
mentioned and carcass and shelf assembly.
The Cross Stop is two outrigger-like assemblies which are basically a scale and a movable pin. These assemblies attach on either or both sides of the Domino base plate with a dovetail joint (right).
 Each
outrigger has a scale and a moveable, lockable guide pin. This pin is used
to index the Domino from a previously cut mortise.
Each
outrigger has a scale and a moveable, lockable guide pin. This pin is used
to index the Domino from a previously cut mortise.
The Cross Stop operates much in the same way
of an indexing shelf pin jig. You set the moveable stops or guide pins to
the distance you choose between your mortises. Then you mill your first
mortise, and each subsequent mortise is indexed off the previous one. The
photo at right shoes the Cross Stop Guide Pin "hooked" into a mortise and
indexing the Domino for the next plunge.
 Another
previously mentioned aspect of indexing is the use of the two built in guide
pins. These stops are great to position your first mortise on the piece
and they use the edge of the work as the reference point. I always place
my first mortise when using the Cross Stop with the Domino's built in stop pins.
Another
previously mentioned aspect of indexing is the use of the two built in guide
pins. These stops are great to position your first mortise on the piece
and they use the edge of the work as the reference point. I always place
my first mortise when using the Cross Stop with the Domino's built in stop pins.
[Page 1] [Page 2] [Page 3] [Next]